Super Easy Testimonial Slider in Squarespace 7.1 (CSS snippets inside)
Create a custom testimonial block to bulletproof any page of your website
Testimonials are truly important for your sales. There is nothing better you can do on your website than to back up your products and services with good reviews. It is in human nature to look for social proof. Remember how you usually look for reviews before buying a product yourself? We all are wired to search for opinions and testimonials before making decisions.
So when you add a testimonial section, you actually help your prospects to make a decision faster.
However, when the testimonial block is poorly designed, the reviews lose some of their credibility. Today we are going to learn how to pack your testimonials into a nice slider with your customers’ pictures just like in our Premium Squarespace Template Solange. Check it out in the demo on the Investment page.

This tutorial works for Squarespace 7.1. We will use a bit of CSS code, but it is beginner-friendly.
Step 1. Create a storage place for your testimonials
You will be able to add a testimonial block to any page of your website. But first things first, we need to store them somewhere.
Squarespace 7.1 allows us to create as many blogs as we want, and we use this feature heavily. Find more ideas on how to use multiple blogs on your Squarespace website in this tutorial.
Your testimonials will live in a separate blog in the Not Linked section of the website. Since you will create it in the Not Linked section, your website visitors won’t have direct access to it.
In your Squarespace website admin go to Pages, scroll down to the Not Linked section in the right-side menu, click on the plus sign to create a new collection, and choose blog.

You can choose any design of the blog because it doesn’t matter in this case.
Let’s rename the blog itself in the menu. Double-click on the Blog and rename it to Testimonials.

In the blog, add as many blog entries as you have testimonials. In our example, we have four.
Now we are going to tell you the trick. You do not have to edit the content of the blog entry itself except for the title. In other words, you don’t need to add a text block with the testimonial and the picture block.
You need to edit only the title. Add the name of the person in the title of the blog post.
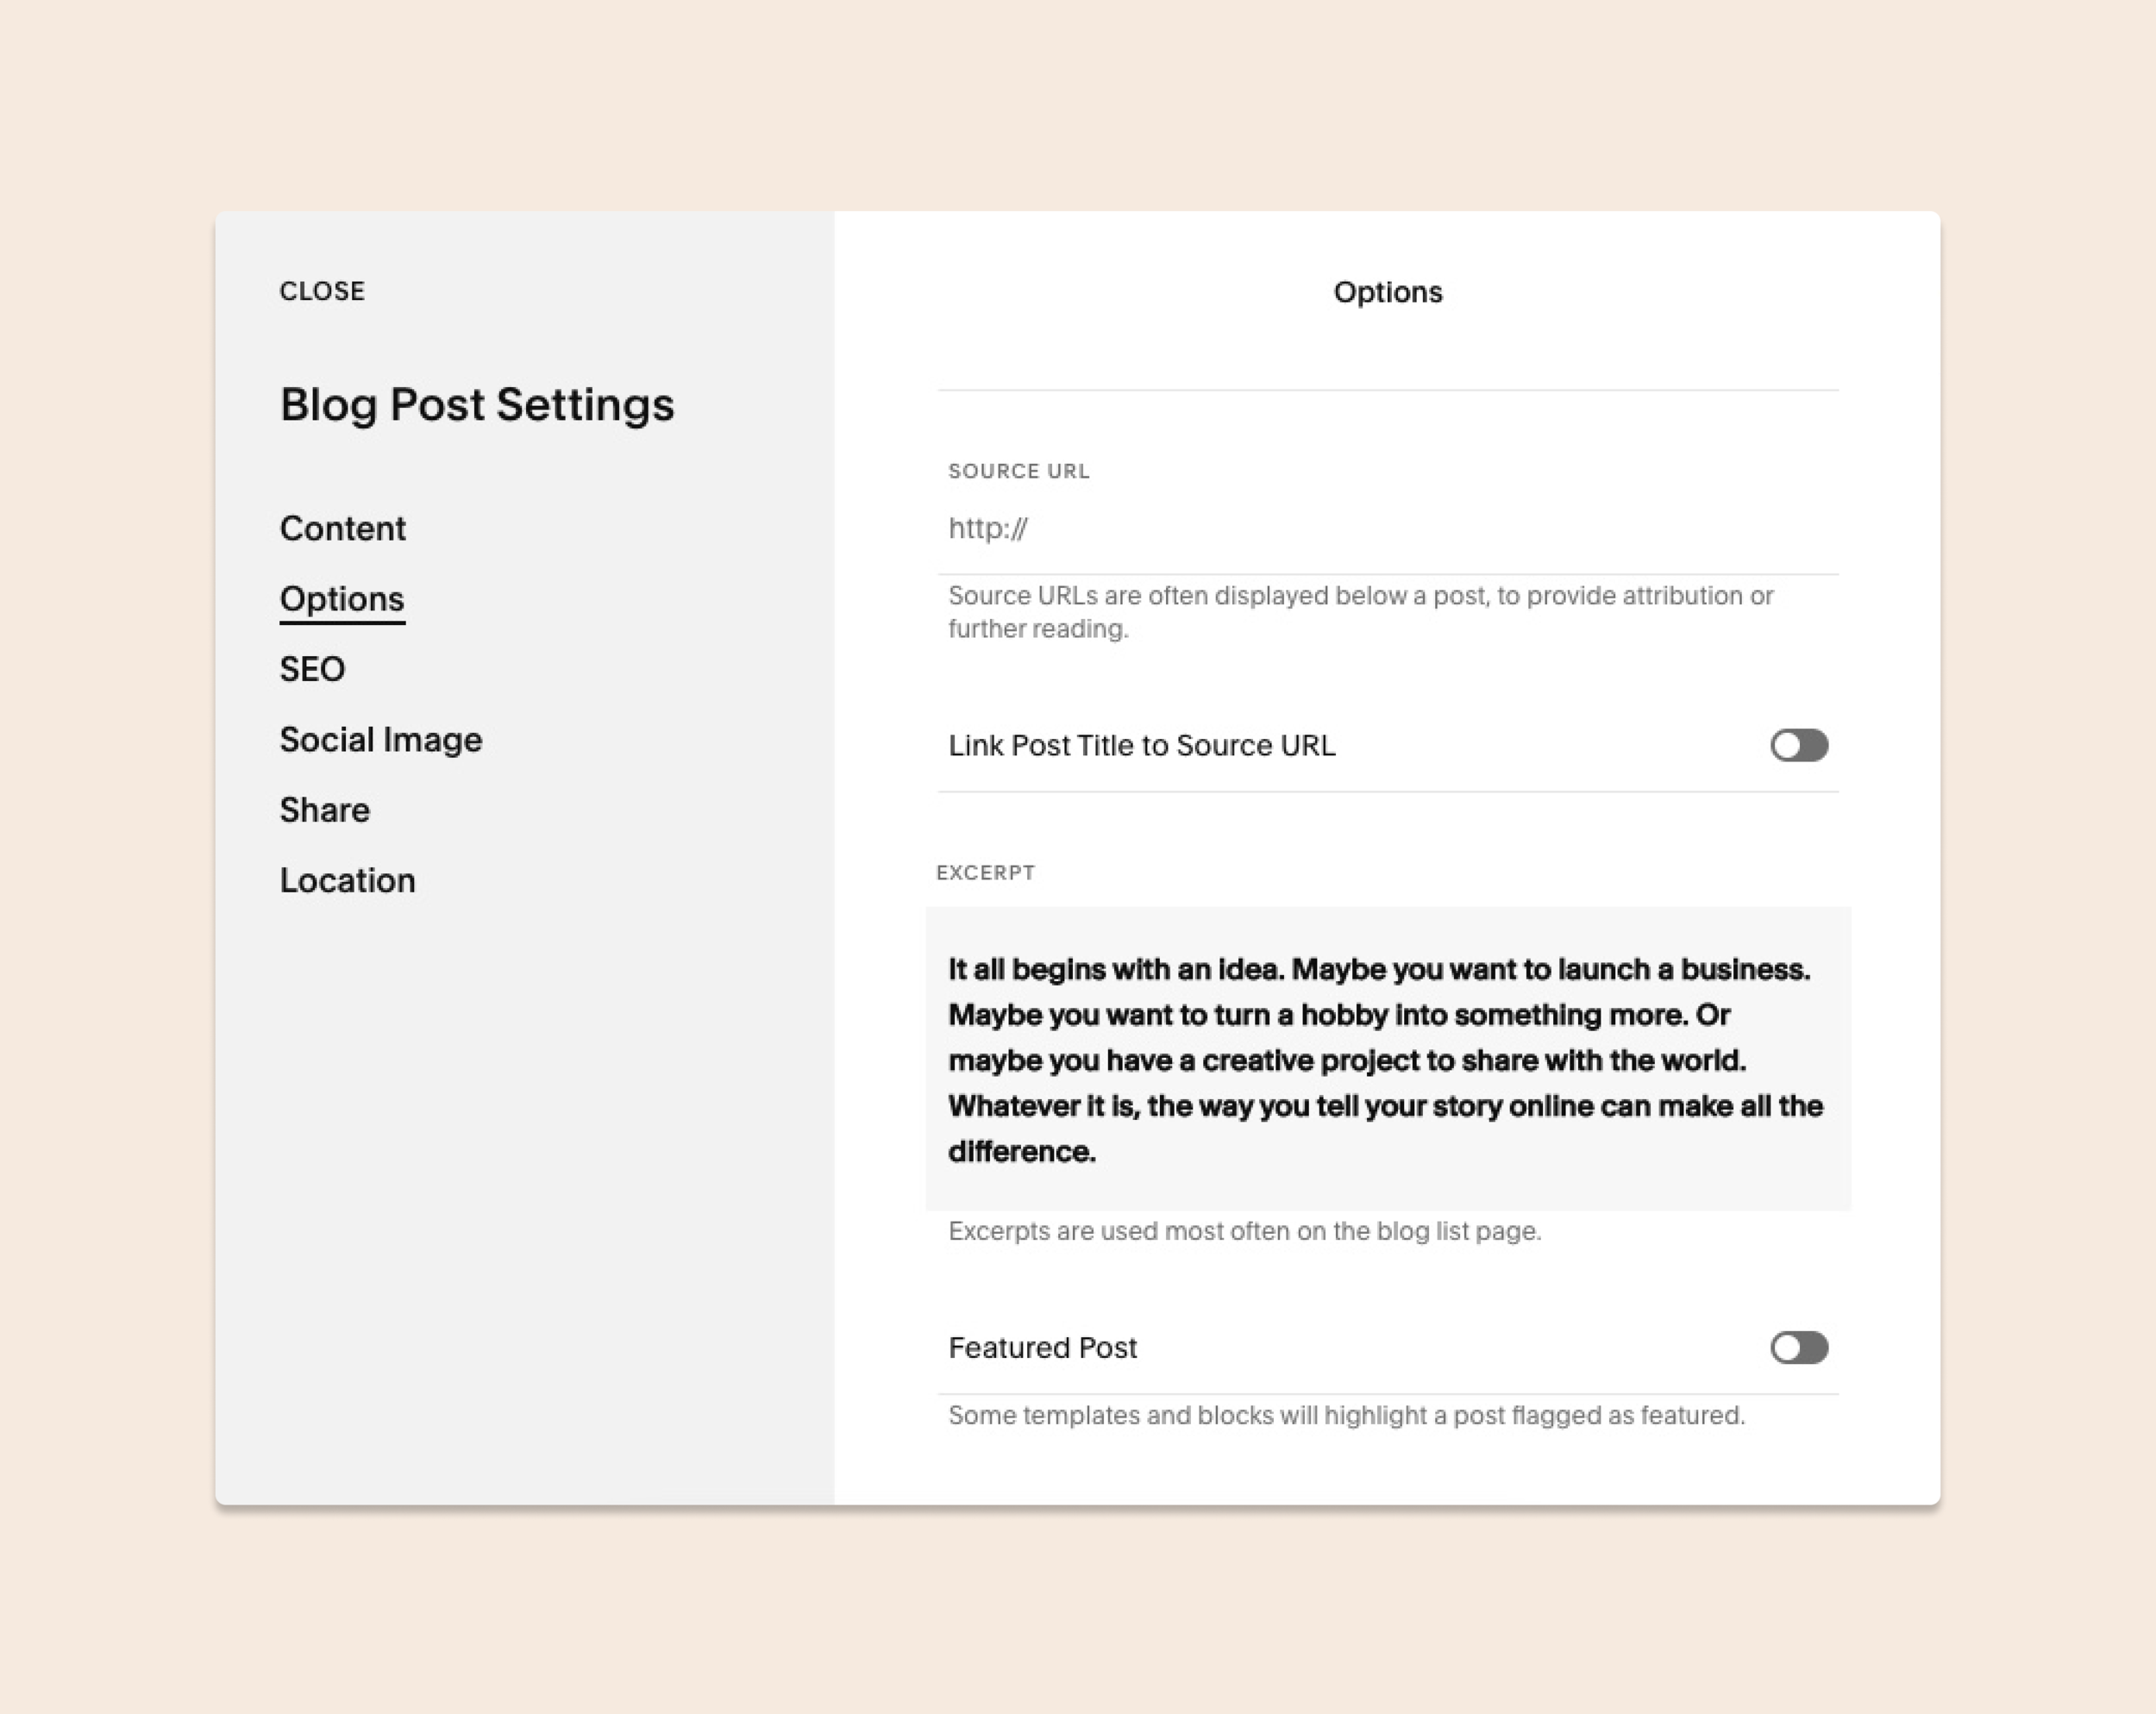
Instead of adding their picture and review in the blog post, you need to go to the settings of the blog entry. Click on the three dots next to the name of a blog entry, click settings and choose options. Upload a picture as a thumbnail image. It should be a square picture. Then scroll down and add a testimonial text in the excerpt text box.
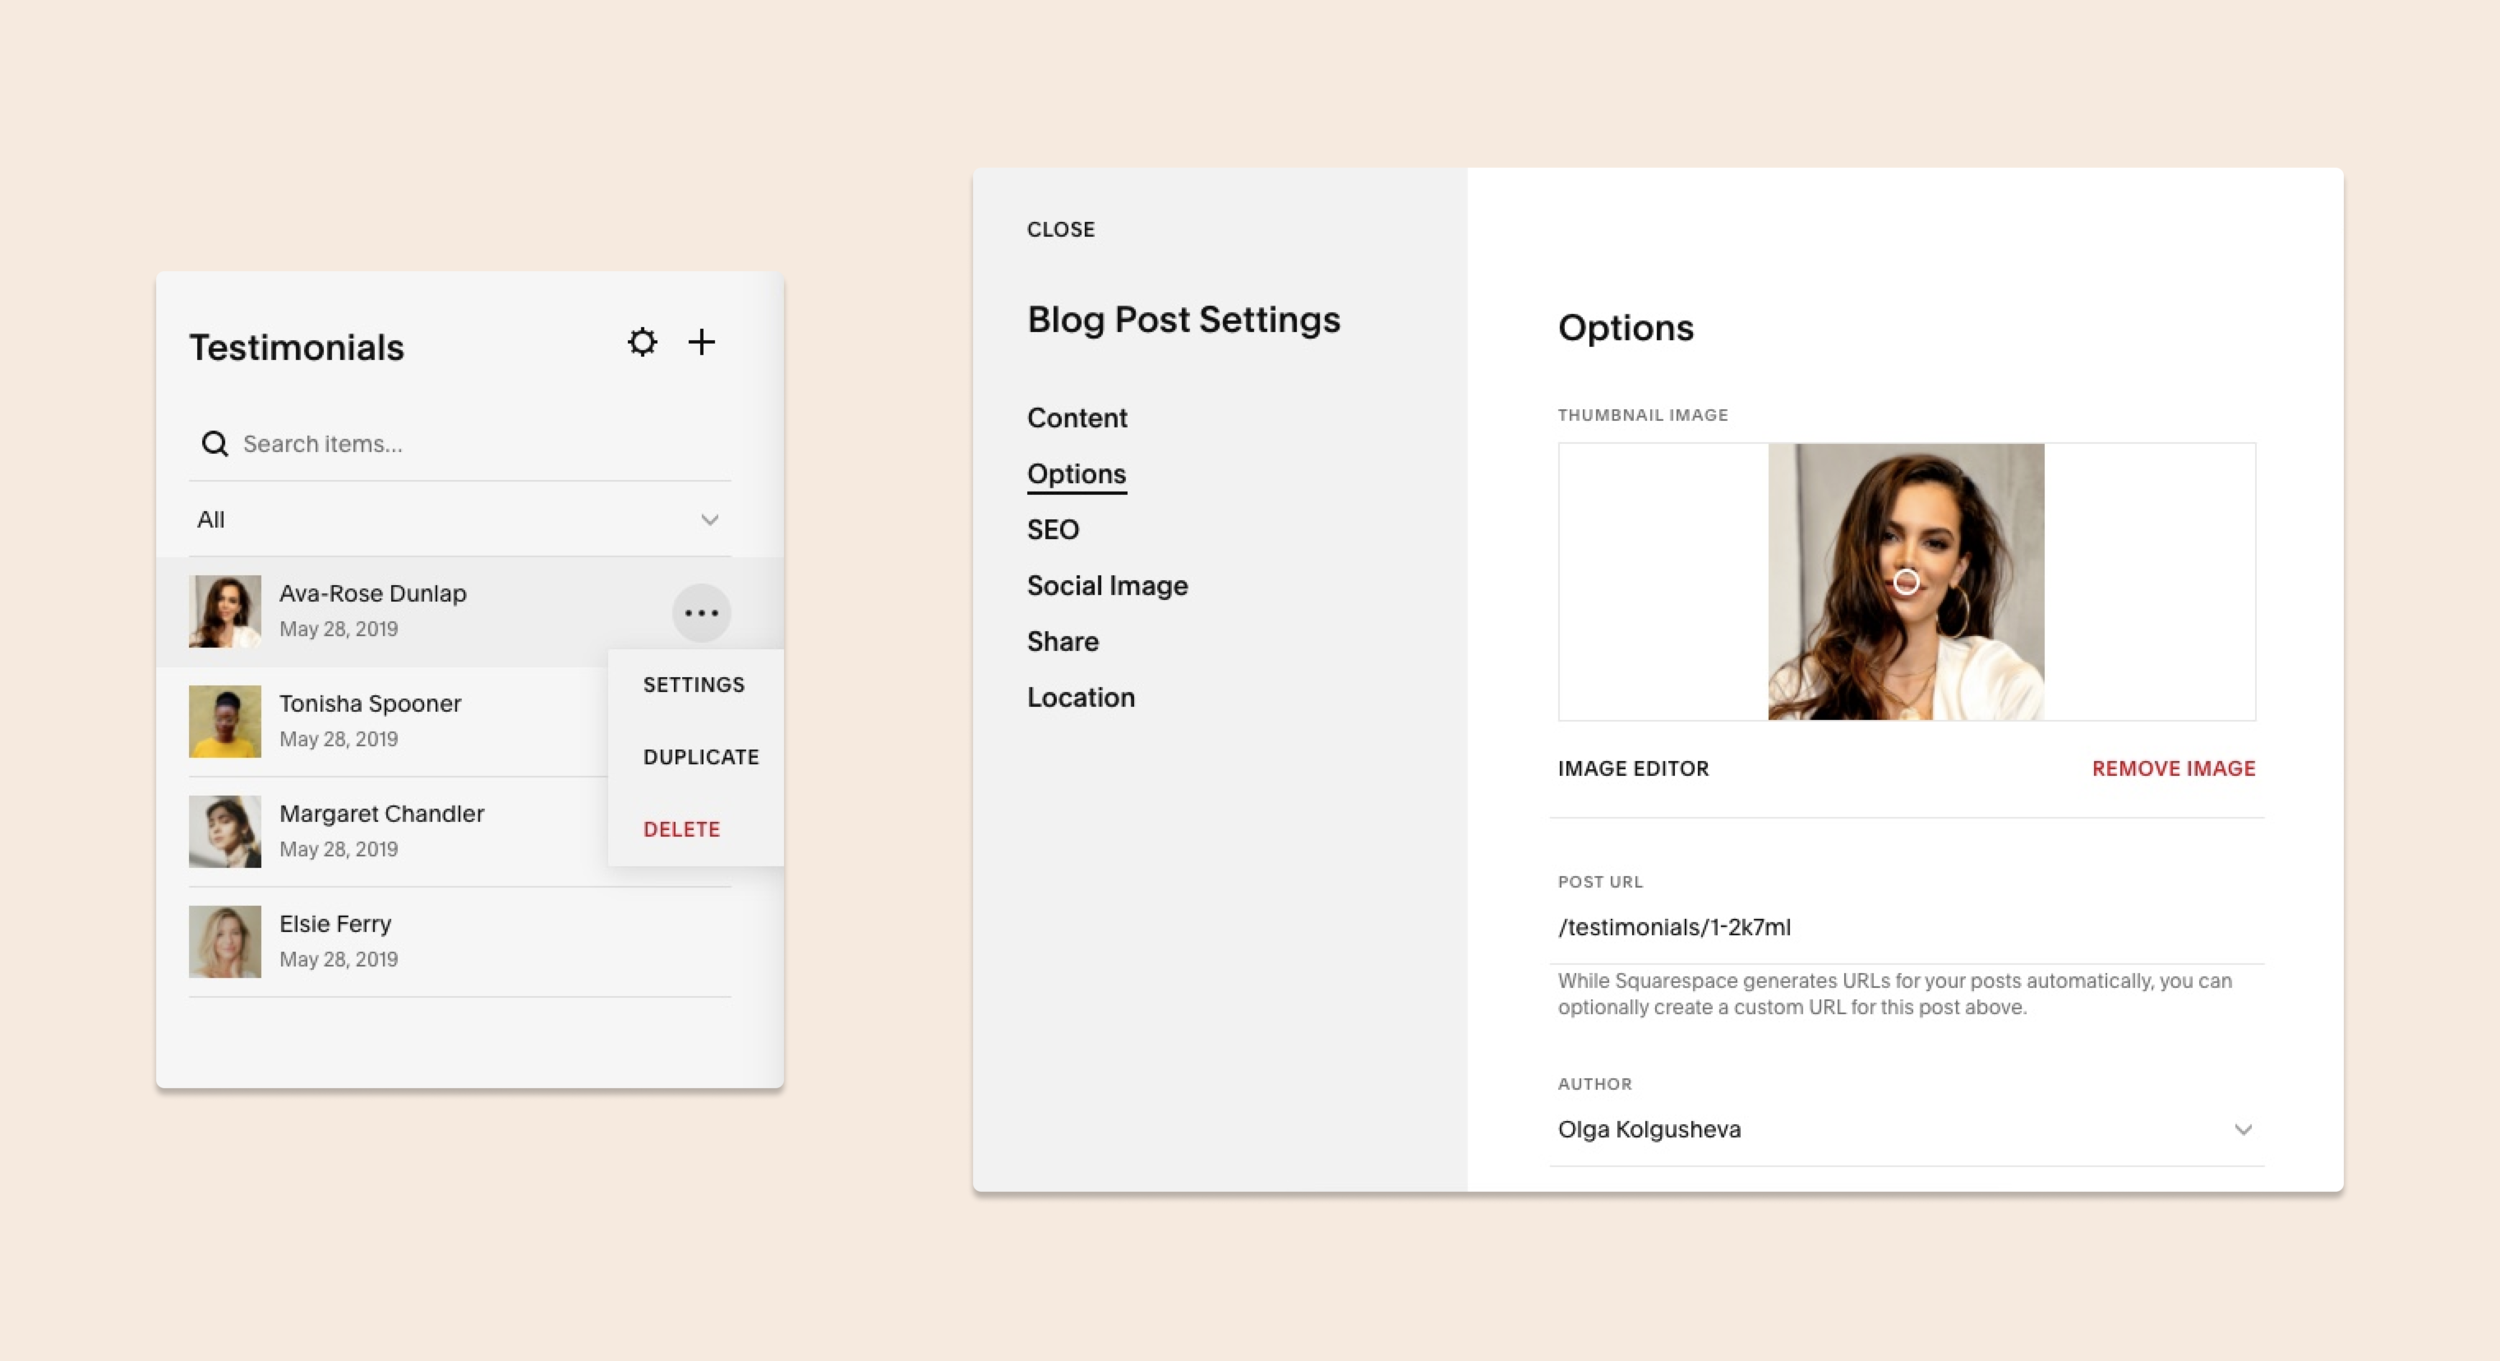
The good news is that the excerpt takes the typography options we have on the website i.e. you have all the paragraph and heading sizes options here.
Add as many people as you need in separate blog entries and we will proceed with the next step.
Important note: Your images need to be square in order to show up correctly in a testimonial slider.
Step 2. Adding and styling a summary block
Go to a page where you want to have your summary block. It could be any page on your website.
Click edit and add a blank section to the page. Add a nice background picture in the section settings.

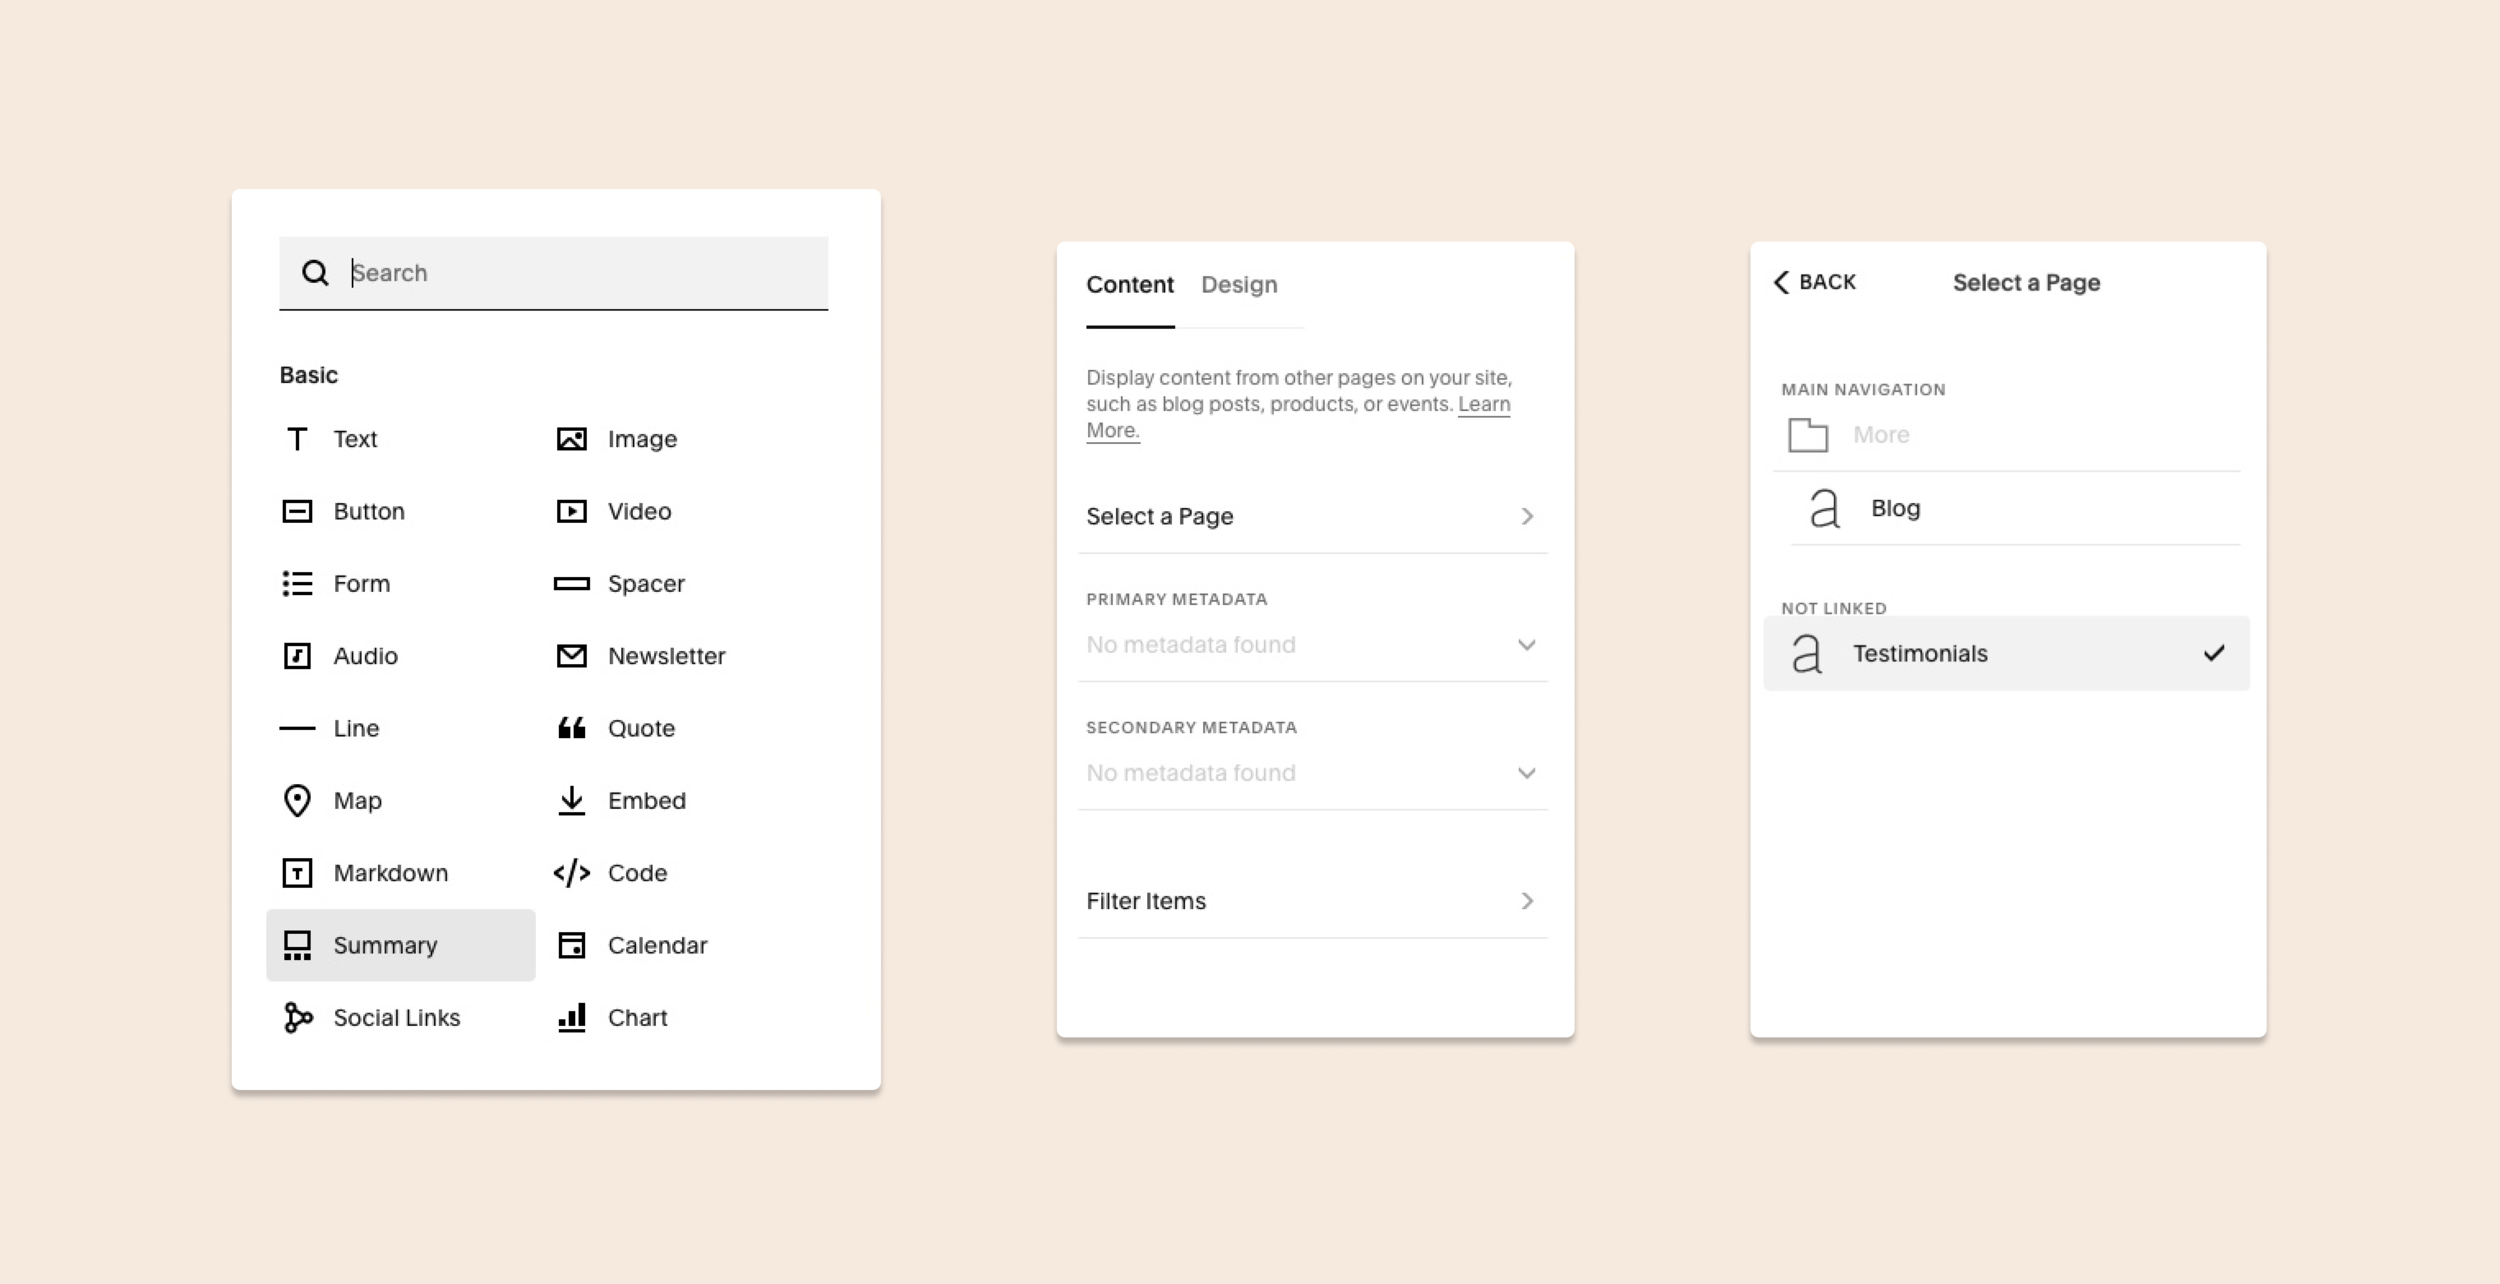
Add a summary block to your section. In the block’s content section click select a page and choose a testimonial blog we have created in the previous step. Now this summary blog will pull the data from the blog.
It looks a little weird for now, but we are going to style it soon.
Start by changing the colors in the section settings to a color scheme you like and change the section height. Add a text block above the summary block and type in the headline.
Style the summary block itself: No metadata, carousel, 1 item per row, auto aspect ratio, centered XL text. Here are screenshots of the settings you need to apply.

Click Save in the upper left corner. Do not worry about how your summary block looks for now, trust the process. What you see is that the picture is too big and square, but this is ok.
Step 3. Styling testimonials with CSS
In the main right-hand menu of your website menu go to Design > Custom CSS and insert the following snippet of code in the text box.
// Testimonial Slider
section[data-section-id="YOUR-SECTION-ID"] {
  .summary-thumbnail {
    border: none;
  }
  .summary-item-list {
    pointer-events: none;
    .summary-item {
      padding-left: 20px !important;
      padding-right: 20px !important;
    }
  }
   .summary-item-list img {
    border-radius: 100% !important;
    height: 150px !important;
    width: 150px !important;
  }
  .summary-thumbnail-outer-container {
    height: 150px !important;
    width: 150px !important;
    margin: 0 auto;
  }
  .summary-item-list img {
    border-radius: 100% !important;
    height: 150px !important;
    width: 150px !important;
  }
  .summary-title {
    margin-top: 30px !important;
    font-size: 1rem !important;
    font-weight: 600;
    letter-spacing: 1px;
    font-family: proxima-nova;
    text-transform: uppercase;
    text-align: center !important;
    pointer-events: none;
  }
  .sqs-block-summary-v2 .summary-block-setting-design-carousel .summary-carousel-pager {
      float: none;
      width: 100%;
      position: absolute;
      bottom: 20%;
      left: 50%;
      -webkit-transform: translate(-50%, -50%);
      -ms-transform: translate(-50%, -50%);
      transform: translate(-50%, -50%);
      -webkit-box-pack: justify;
      -ms-flex-pack: justify;
      justify-content: space-between;
      z-index: 9;
      color: #fff !important;
  }
  @media screen and (max-width: 640px) {
    .sqs-block-summary-v2 .summary-block-setting-design-carousel .summary-carousel-pager {
        width: 80%;
    }
  }
}
We need to tell Squarespace where exactly we want to apply these settings. In the second line of the code you can see section[data-section-id="YOUR-SECTION-ID"]. You need to swap this line to your section ID.
Go to the page where your testimonial block resides and grab ID of its section.
To quickly grab the section ID, you will need to install a Chrome plugin Find Squarespace IDs.

Simply click on the extension, and it will bring up all section IDs. Click on a section ID to get it copied. Paste it into your code & save the changes.
That is it! Your block is shaped and styled nicely now. The pictures are in circles and the slider changed its size. We hope you like it!
Creative Workshop Series for Squarespace
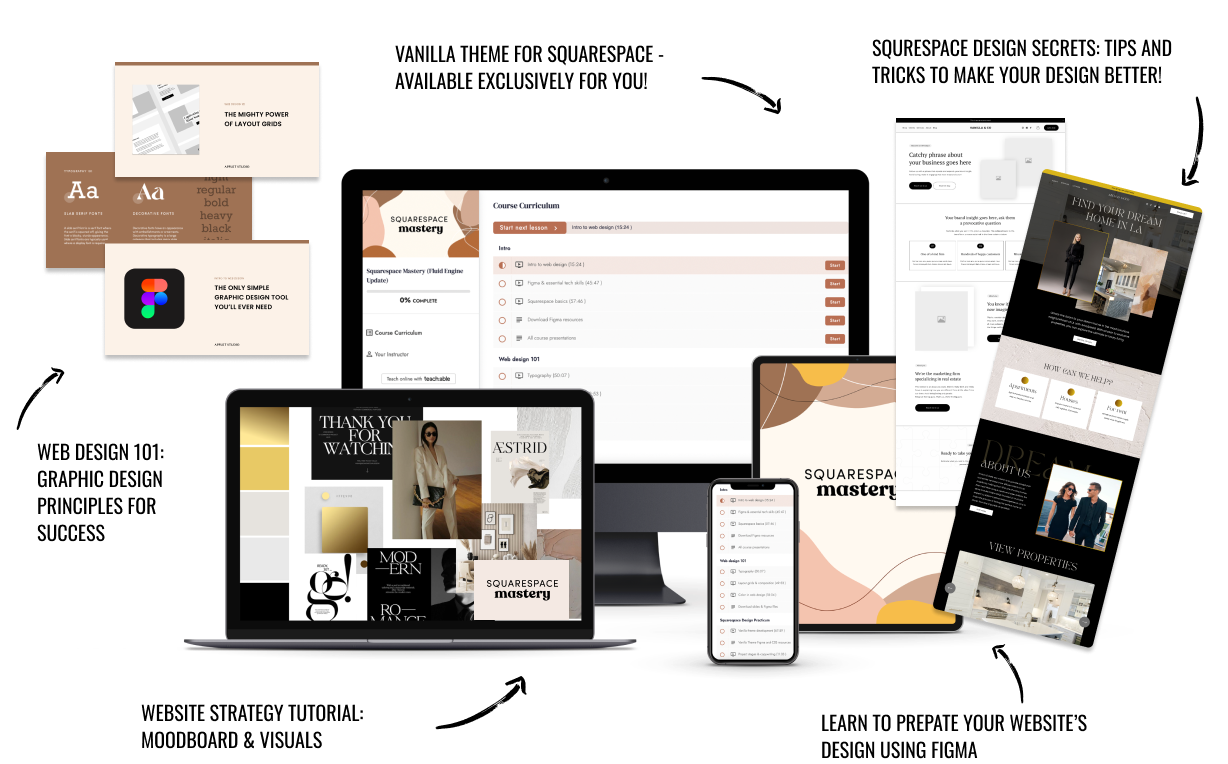
The workshop is jam-packed with design goodness. Inside, you’ll find the following topics:
What size should I design for? Responsive layouts and industry standards
Typography 101: How fonts can elevate your design & look professional
How to use layout grids to direct the attention of your website visitors
How to create a mood board and plan your website visuals
Squarespace wireframe for Figma: reusable layouts to plan your website design
Start implementing your website right away: Use our videos to recreate layouts
Design secrets & tricks for Squarespace: Design a gorgeous website without code
Learn how Squarespace blocks behave and adapt to design mobile-friendly layouts
How to grow as a designer and how to look for creative inspiration
